30
10/15
21:55
Adding Contour Lines in Google Earth
It took me the better part of a day to figure this out, so I thought I would write down the steps…
The Goal: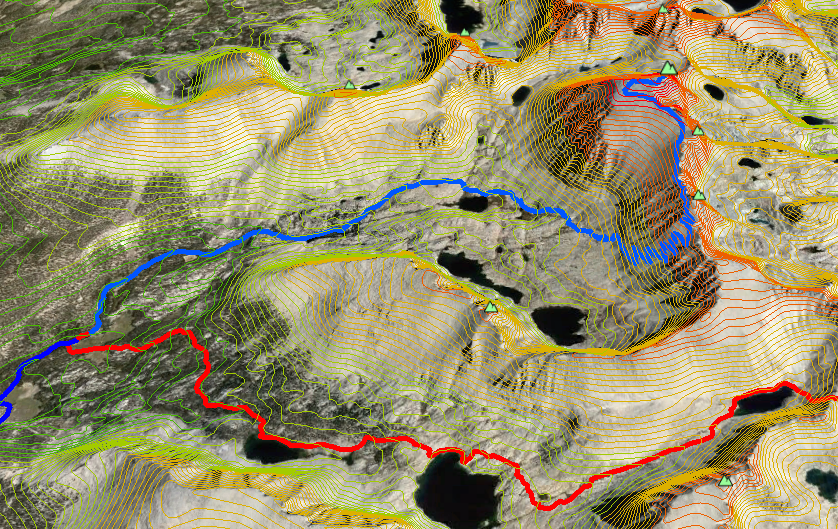
First we need the contour data:
- Data comes from this excellent site (US Only): http://viewer.nationalmap.gov/viewer/
- Zoom in on your area of interest
- Click “Download Data” in upper right corner of screen
- Select the first option to “Click here to draw and download by Bounding Box”
- Drag a rectangle that covers the area of interest
- Select “Contours” in the dialog and click Next
- You will be presented with a list the available products covering the selected area
- Select the Shapefile covering your are of interest
- The data we are looking for is “USGS NED 1/3 arc-second Contours” in the Shapefile format
- If you’re lucky, you will have just one Shapefile that covers your area
- The shopping Cart will open on the left side of the screen
- Click on the item and it will be listed in the bottom portion of the screen
- Then click on the “Download” option and save the file to your PC
- Note: These can be very big files…
- Extract the zip file into its own folder (shapefiles are actually a collection of separate files)
Not as difficult as it sounds. Here is a video…
Moving on to the Google Earth part… Download and install Google Earth Pro – Which is now free!!
- Open Google Earth and go to the location of interest
- Figure out the highest and lowest points of interest and write down the altitude value for later
- Set the view in Google Earth to just the area you are interested in – Top down view is good
- Do File>Import
- Change the file type to ESRI Shape (.shp), find and select your shape file.
- Depending on the size of the shape file, it could take a while to process. This is a lot of data!
- Then you get to select what to import – Select Restrict to View (or All if you are patient)
- Again, this will take some time…
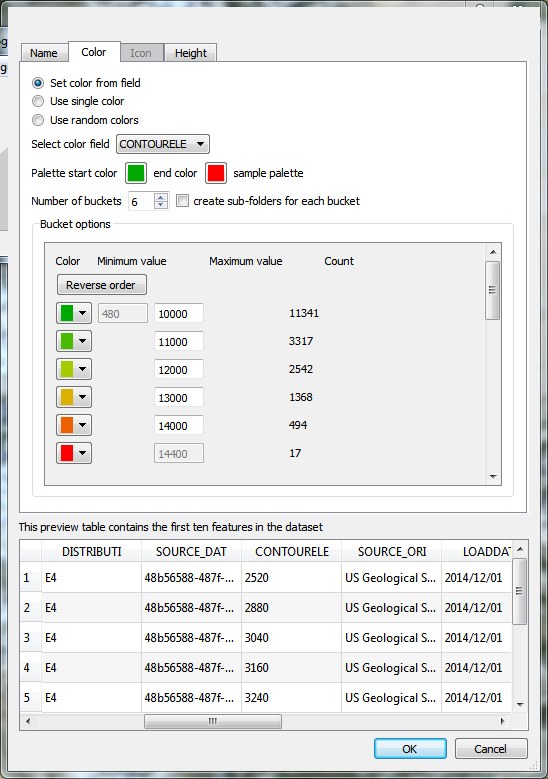
- Say Yes to the Contour Template prompt and you will end up at a dialog as shown below – select the color Tab
- This dialog is a little funky (IMHO) – it took me a few tries to get it set up
- Select “Set color from Field” and select “CONTOURELE” as the field of interest
- Then it is just your particular tastes to set up a range of colors between your highest and lowest points
- Once you are happy, click OK – GE will ask if you want to save the template – you do
- Then wait again… When it is done thinking, you can turn on the contours in your temporary places folder
QED…
Comments Off on Adding Contour Lines in Google Earth